When developing a CBD report in the ER framework, there are situations where data needs to be displayed within nested ranges. For instance, in a sales invoice report, invoice lines might have associated markup charges for each line. This blog post will guide you through setting up nested ranges in a Word template to handle such scenarios effectively.
Format Design for Nested Ranges
To properly display invoice lines and their associated charges on a sales invoice, you need to structure the format as follows:
- Create a Range for Invoice Lines: Start by defining a record range for the sales invoice lines in your format design.
- Create a Nested Range for Charges: Inside the range for invoice lines, add a second nested range to contain markup charges specific to each line.
The resulting format structure should resemble the following:
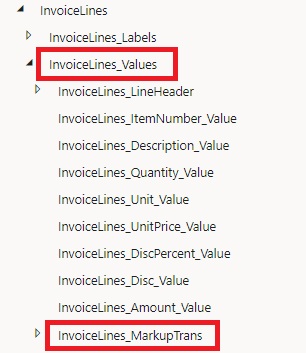
Set Up the Word Template
To implement the format structure in your Word template, create a basic table that organizes the data as follows:

Step 1: Create the Table Structure
- Add a row for column headers at the top.
- Set the InvoiceLines_Values record range as a repeating content control spanning the second to the last row of the table.

Step 2: Map Invoice Line Fields
- Use the first row of the repeating section to display fields like Item ID, Description, Quantity, Unit, and Amount.
- In the second row of the repeating section (third row of the table), set the record range for the charges using InvoiceLines_MarkupTrans .

Step 3: Add a Placeholder Row
- Include a placeholder row as the last row of the InvoiceLines_Values repeating section. This row prevents layout issues during printing caused by overlapping start/end tags of the parent and child repeating content controls.
- To minimize unwanted spacing, select the placeholder row and set its font size to 1 pt.
The resulting table should look something like this:

Handling Empty Charges Rows
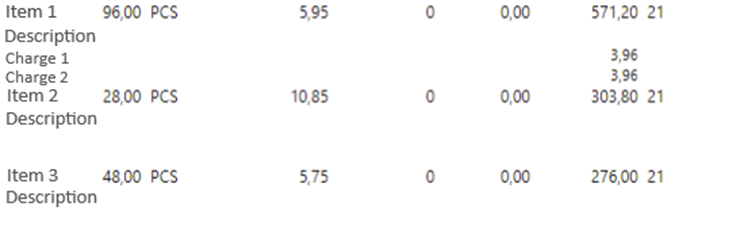
When some invoice lines have no charges while others have multiple charge lines, the default setup can create empty rows for lines without charges. For example:
- Line 1: 2 charge lines.
- Line 2 and Line 3: No charges. This would then result in a table output where we have 2 empty rows on each invoice line.
The example might look something like this:
Solution
One solution that you might think of is to use the removed property on the InvoiceLines_MarkupTrans record list, however that will not work as you might imagine. Instead, it will only check if the first invoice line has any charges on it, and if it does not then the whole InvoiceLines_MarkupTrans content control will be removed and no charges will be shown for any other invoice line.
To minimize empty space and ensure proper formatting of charges rows in your Word template, follow these detailed steps to create a style and apply it to content controls.
Step 1: Create a New Style
- Open the Styles Pane:
- Go to the Home tab in Word.
- Click the small arrow in the Styles section to open the Styles pane.
- Create a New Style:
- In the Styles pane, click on the New Style button (usually a small icon at the bottom of the pane).
- In the Create New Style from Formatting dialog box:
- Enter a name for your style, e.g., “ConditionalFormattingStyle.”
- Set the font size to your preferred value (e.g., 10 pt or 11 pt).
- Choose other formatting options as needed (e.g., bold, italic, or font color).
- Click OK to save the style.
Step 2: Apply the Style to Content Controls
- Select the Content Control:
- In your Word template, click on the content control you want to format (e.g., a field in the charges row).
- Open Content Control Properties:
- Right-click the selected content control and choose Properties.
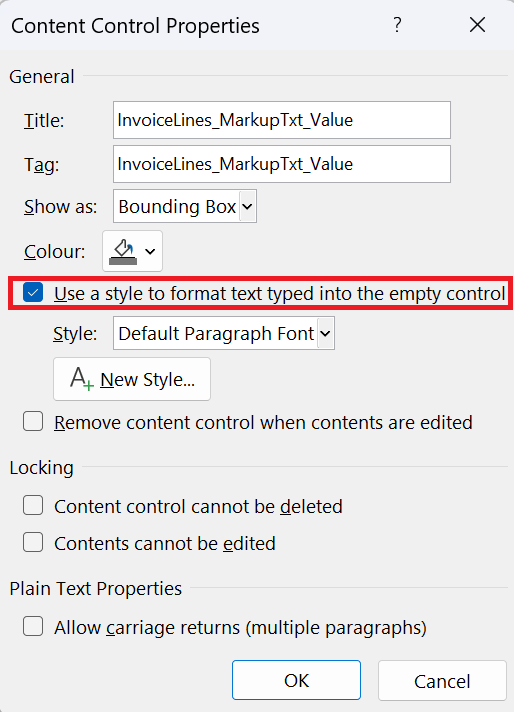
- Enable Conditional Display:
- In the Content Control Properties dialog box, check the option Use a style to format text typed into the empty control.
- Apply the Style:
- Click on the newly created style (“ConditionalFormattingStyle”) to apply it.
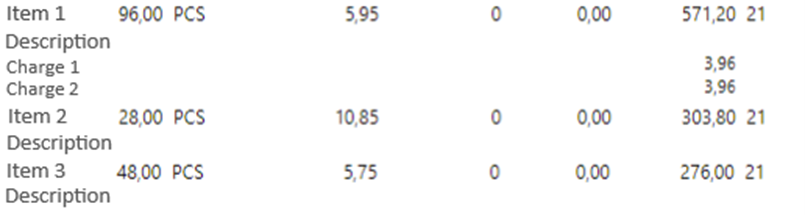
Final Output
After these adjustments, your template will produce a clean and professional output:
- Invoice lines without charges will have minimal empty space.
- Invoice lines with charges will display charges correctly.
By following these steps, you can effectively manage nested ranges in a CBD report, ensuring that your Word templates are both functional and visually appealing.