In Microsoft Word, customizing the layout of complex document templates requires careful attention to detail, especially when it comes to ensuring a clean print. One of the most common challenges is controlling how specific sections are displayed across pages. For example, if a table is slightly too large to fit at the end of one page, Word may split it across two pages by default, which can interrupt the visual flow and readability of the document.

In this post, we’ll explore practical techniques for keeping entire sections or tables together on a single page when printing. This guide will walk you through setting up Word’s pagination options to ensure your content displays exactly as intended. Let’s dive into how you can make sure your content maintains its structure from screen to print.
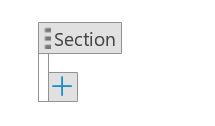
Create and setup a Parent Content Control
To start, set up a parent content control around the entire section you want to keep on a single page. This is essential to ensure that Word treats the section as a single block.
- Select the Location for the Content Control: Place your cursor at the position in the document where the section begins. This will serve as the starting point for the content control.
- Insert the Parent Content Control:
- Navigate to the Developer tab in the Word ribbon. (If the Developer tab is not visible, enable it by going to File > Options > Customize Ribbon and checking “Developer.”)
- Under Controls, click on Rich Text Content Control or Plain Text Content Control, depending on your content needs.
Adjust Paragraph Settings for the Content Control
Now that you’ve created the parent content control, adjust its paragraph settings to prevent page breaks within the section.
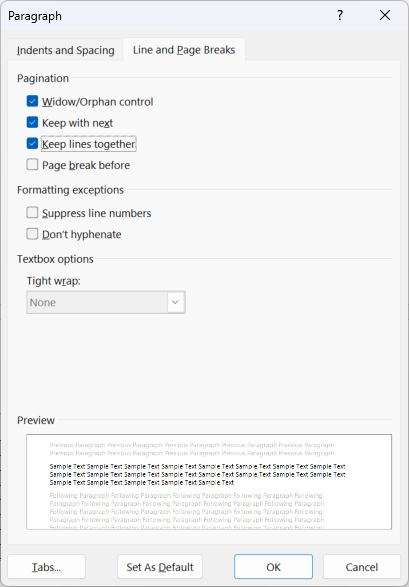
- Open Paragraph Settings: With the content control selected, go to Home > Paragraph > Paragraph settings, or simply right-click on the control and select Paragraph.
- Enable “Keep Lines Together” and “Keep with Next”: Under the Line and Page Breaks tab, check both “Keep lines together” and “Keep with next.” These settings ensure that Word will move the entire section to the next page if there isn’t enough space on the current page.

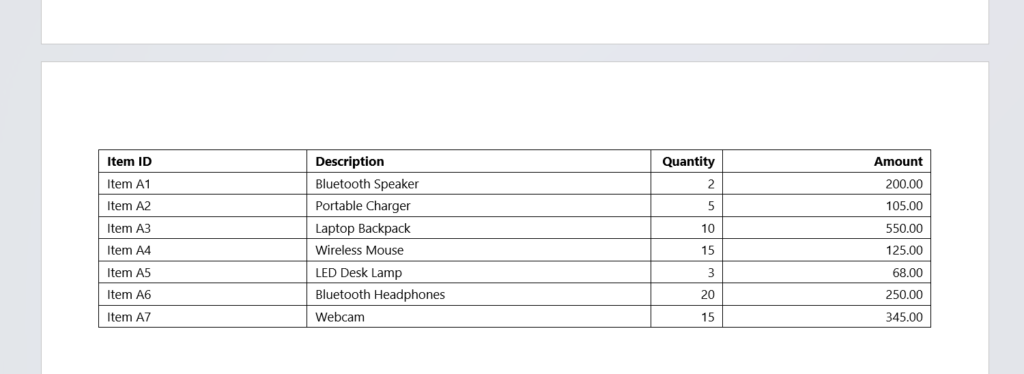
Create Your Table
Now that the content control is set up, you can create the table within it. While the content control is still selected, insert your table.
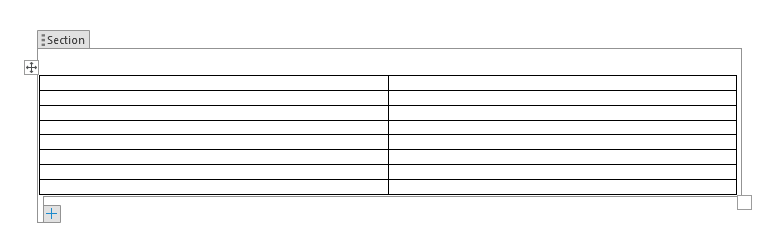
This action nests the table within the content control.
Apply Line and Page Break Settings to Table Rows
Finally, apply the same settings to the rows within the table to keep them together.
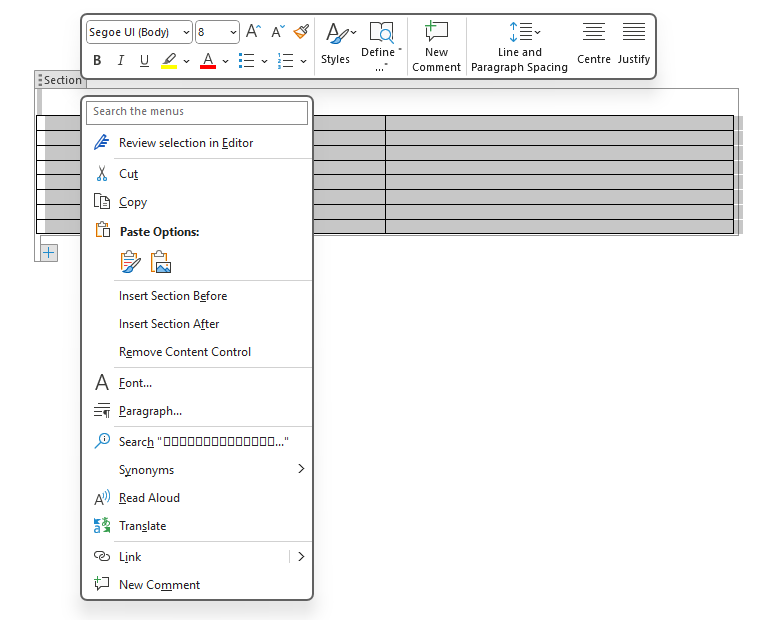
- Select all the rows within the table (or any additional elements in the content control).
- Right-click the selection, go to Paragraph settings, and enable Keep lines together and Keep with next again under Line and Page Breaks.
Final Result
With this setup, Word will automatically move the entire section to the next page if there’s not enough room for it on the current one. This approach preserves the integrity of the layout, ensuring that no table or section is split across pages unexpectedly.