
In Dynamics 365 Finance and Operations, the Electronic Reporting (ER) framework offers robust tools for creating Configurable Business Document (CBD) reports tailored to your specific needs. Continuing from our previous blog post describing How to add a custom electronic reporting (ER) CBD report to print management, we will now explore how to develop and execute these custom reports using ER.
We will cover the steps needed to create a dedicated data provider class, setting up parameters for report customization, and executing custom CBD reports through the UI.
Creating our CBD configurations
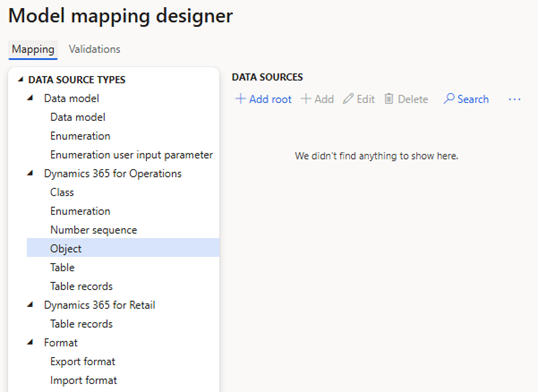
We are going to start off by creating our CBD configurations which consist of a model, a model mapping and a report format.
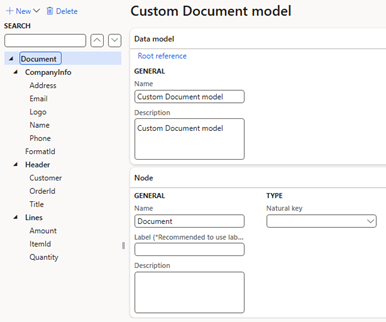
For our example, we will have a model configuration named Custom Document model, out of which we will derive two new configurations, a model mapping and a report format.

In our model, we have created a root node with a few Record and Record list nodes which additionally themselves contain a couple of data fields.
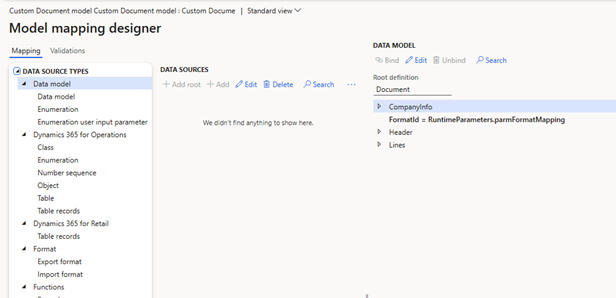
After the creation of the model mapping configuration (which is based on a completed version of our model), we are still missing the mappings between our model and our data sources. We will get to that step later in this blog post.
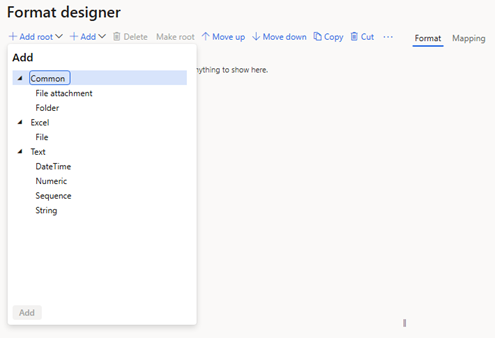
As the last step of this section we will need to do the initial setup of our report format. Here we will need to create a root node which will link to our template attachment and its parameters.
Create the data contract, controller and service classes
To execute our custom CBD report in code, we will need to create a new data contract, a controller and a service class. We will start with our data contract which will extend the standard ERFormatMappingRunBaseContract.
[DataContract]
public class CustomDocumentERContract  extends ERFormatMappingRunBaseContract
{
}
Here we can add additional parm methods which can be used to pass information such as specific fields or whole datasets to our CBD model mapping. We can achieve this by using the following code sample:
SalesId salesId;
[DataMemberAttribute('SalesOrder')]
public SalesId parmSalesId(SalesId _salesId = salesId)
{
    salesId = _salesId;
    return salesId;
}
Our next step would be to create the service class and for that purpose we will need to extend the SysOperationServiceBase class. Here we are defining a few variables which will later be used to initialize and run the report:
- ER Model Data Source name – set this as “model”
- The default file name for when we are exporting the report
- Parameter data source name – this will be the name of our contract object when we add it to the model mapping
using Microsoft.Dynamics365.LocalizationFramework;
class CustomDocumentERService  extends SysOperationServiceBase
{
    public const str ERModelDataSourceName = 'model';
    public const str DefaultExportedFileName = 'Custom document printout';
    public const str ParametersDataSourceName = 'RuntimeParameters';
}
The second part that we will need in our service class is a method which will return the RecId value for our custom CBD report format.
public static ERFormatMappingId getFormatMapping()
{
    return (select ERFormatMappingTable where ERFormatMappingTable.Name == 'Custom Document format').RecId;
}
The above formatMappingId will be used in our main service class method to initialize the ERFormatMappingRun object to which we send the above created parameters and then use to run the report.
public void executeOperation(CustomDocumentERContract _contract)
{
    ERFormatMappingId formatMappingId;
    formatMappingId = CustomDocumentERService::getFormatMapping();
    if(formatMappingId)
    {
        try
        {
            ERIModelDefinitionParamsAction parameters = new ERModelDefinitionParamsUIActionComposite()
.add(new ERModelDefinitionObjectParameterAction(ERModelDataSourceName, ParametersDataSourceName, _contract, true));
            ERIFormatMappingRun formatMappingRun = ERObjectsFactory::createFormatMappingRunByFormatMappingId(formatMappingId);
            formatMappingRun.withParameter(parameters);
            formatMappingRun.parmFileName(DefaultExportedFileName);
            formatMappingRun.withFileDestination(_contract.getFileDestination());
            formatMappingRun.parmShowPromptDialog(true);
            formatMappingRun.run();
        }
        catch
        {
            error("@SYP4861341");
        }
    }
    else
    {
        info("@SYS300117");
    }
}
The last part we need to modify is the controller class which is used when the menu item is triggered. This class contains the main method in which we will call the executeOperation method from the service class.
class CustomDocumentERController extends ERFormatMappingRunBaseController
{
public static void main(Args _args)
{
CustomDocumentERController operation;
CustomDocumentERContract contract;
operation = new CustomDocumentERController(classStr(CustomDocumentERService), methodStr(CustomDocumentERService, executeOperation), SysOperationExecutionMode::Synchronous);
contract = operation.getDataContractObject();
operation.parmShowDialog(true);
operation.startOperation();
}
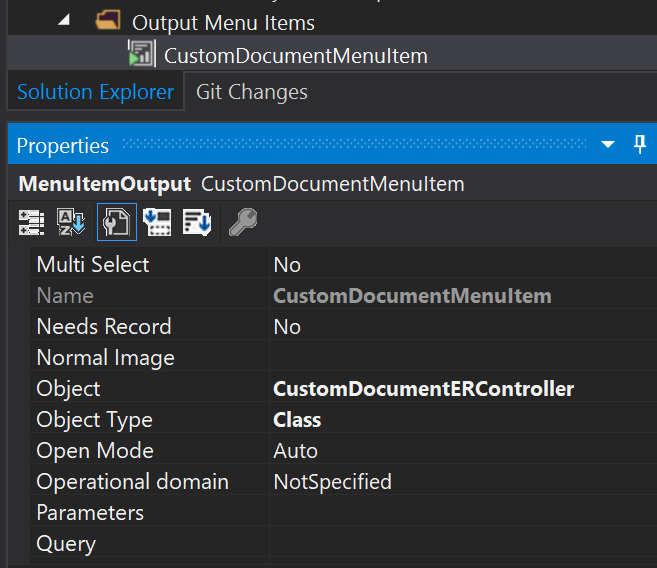
} Create the menu item
Next, we will need to create an output menu item and setup some properties.
- Object Type should be set to Class
- In the Object property we will select our controller class (CustomDocumentERController)
Fill in the data contract
Either from the controller or from the service class, we can use the parm methods we have created in our contract class to pass information to our report format/model mapping.
contract.parmSalesId(salesId); Add the data contract to the model mapping
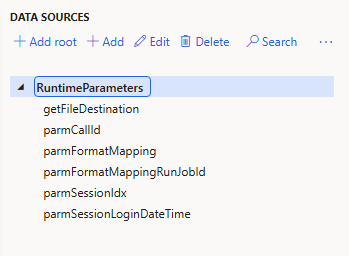
After we have made all the necessary code setup in the controller, service, and contract classes, we will return to the model mapping configuration to finish up with the mapping of the data sources. We will add a new data source which will be of type Object and then set up several of its parameters.
It is important to note here that the Name parameter should be the same as the ParametersDataSourceName parameter in the service class. For the Class parameter we should select our previously created contract class.
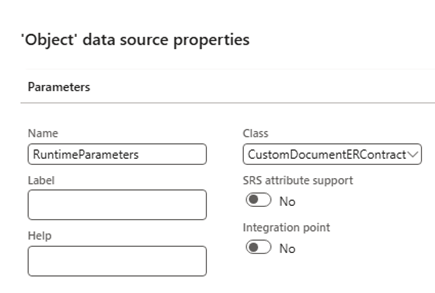
After we’ve added the data source, all of the details that are passed in code will now be available for our use, such as specific fields or whole datasets that can be used for mapping to the fields in our model.
Create and set up an ER destination
To be able to print our report we will need to create and setup a new destination in the Electronic Reporting destinations form.
For our example, we’ll add a new file destination and we’ll then in the Reference parameter select our report format that we’ve created earlier.

After the file destination is created, we then need to select our template in the File component name parameter.
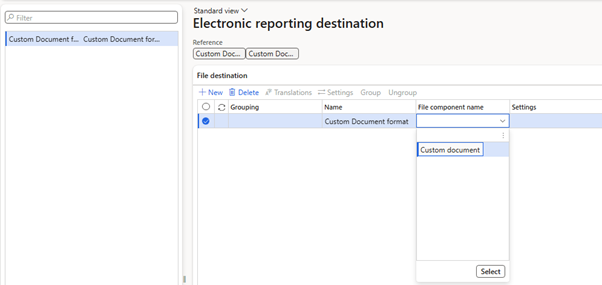
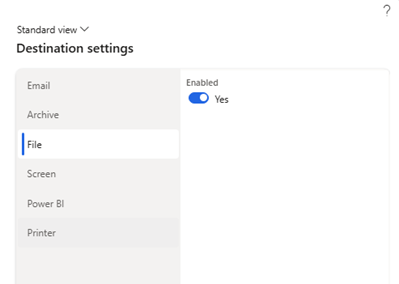
In the end we will need to select our destination in the Settings menu which will determine where the report will be printed to. For our example, we will select File as the destination.
Extra step 1: Set a file name for our CBD report
We have two ways of setting up the file name for our report. We can either do it through code by sending the file name as a string to the format mapping run object (see the following code example):
public const str DefaultExportedFileName = 'Custom document export name';
formatMappingRun.parmFileName(DefaultExportedFileName);
Or, the other option would be to setup our file name in the File name field available under the Mapping section of our root node in the CBD report format configuration:
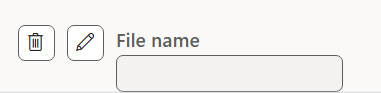
Keep in mind that you can use the file name setup from the report format configuration only if you are not sending a file name through code, otherwise the code will overwrite whatever setup you have done here.
Extra step 2: Execute the report with and without a dialog
When executing the CBD report, a show dialog parameter can be specified on the controller:
operation.parmShowDialog(true);If this is specified as true, then the following form with open up when trying to print the report:
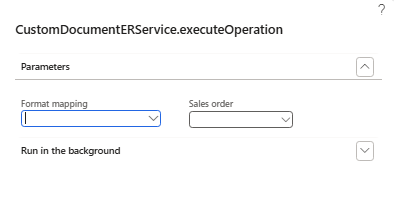
The dialog shown would then list the parameters from our contract class as UI fields in which we can select specific records or data to be used for executing the the report.
Final notes
By following the steps we’ve described in this blog post, you’ll be able to execute your custom developed CBD reports from any location in D365FO that can host menu items. This allows for a better user experience when using custom ER CBD reports as part of your daily routine and is a vast improvement on the default option of executing the reports only from the Electronic Reporting workspace.